Chris's camera pages
How to strip-down and service the Synchro-Compur shutter on a Kodak Retina Ia or IIa camera: continued
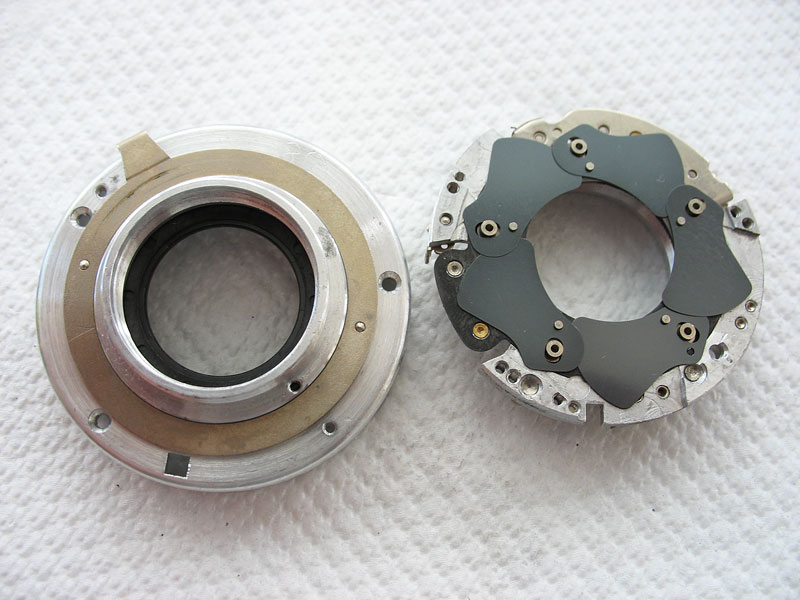
Reassembling the shutter
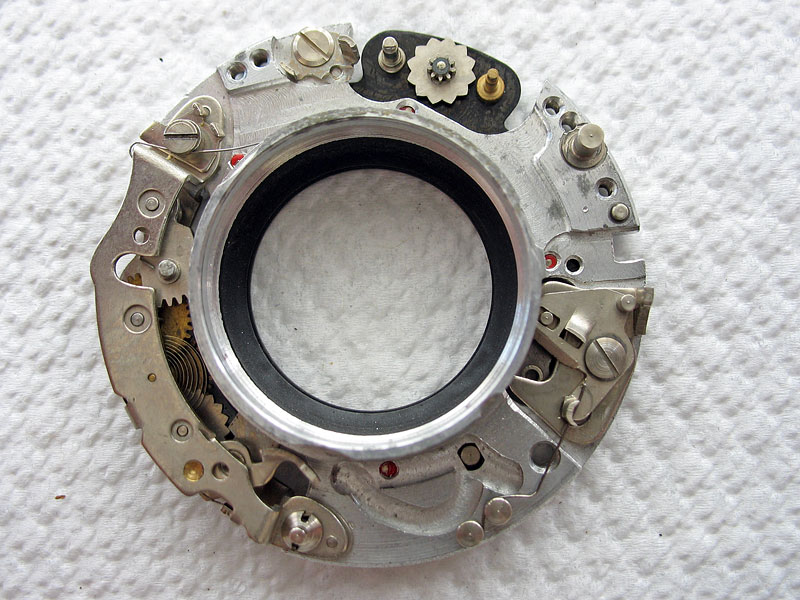
The mechanism plate should be cleaned carefully. I do not usually disassemble this any further unless there are obvious problems needing attention. Clean all visible grease and dirt away, then flush the mechanism with plenty of clean solvent.I usually swing the blade control assembly back and forwards multiple times while the mechanism plate is submerged in, or simply saturated with clean solvent to free up and flush out any remaining deposits of old lubricants.
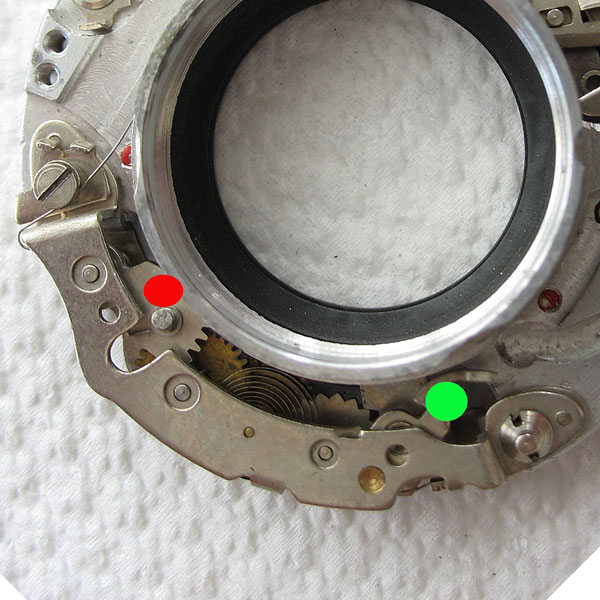
Work the retard gear train repeatedly either in a small container full of solvent, or with repeated flushings with fresh solvent. This will dislodge any dust and grease deposits.The lever marked here in green should be held towards the outside, which unloads the pallet, and meanwhile the lever marked here in red can be pushed towards the outside, and then let return.Blow the remaining solvent out of the mechanism plate using a rubber 'rocket blower' or similar tool.
Regarding lubrication of the mechanism plate, one option is to dismantle it completely and apply a thin film of molybdenum lubricant to the mating surfaces, but I usually prefer to use graphite powder instead.Make sure the mechanism plate is completely clean and dry first, then puff a little graphite powder into the blade control ring. Work the control ring repeatedly to work in a little of the graphite. Next puff a little bit of graphite powder into the retard gear train and work it repeatedly.Blow all traces of graphite powder out of the mechanism plate. Do an especially thorough job of blowing out all loose graphite or later you will surely find tiny sparkles of graphite powder in the lens.Finally moisten a cotton bud (Q-tip) with solvent and wipe the surface of the mechanism plate clean again.
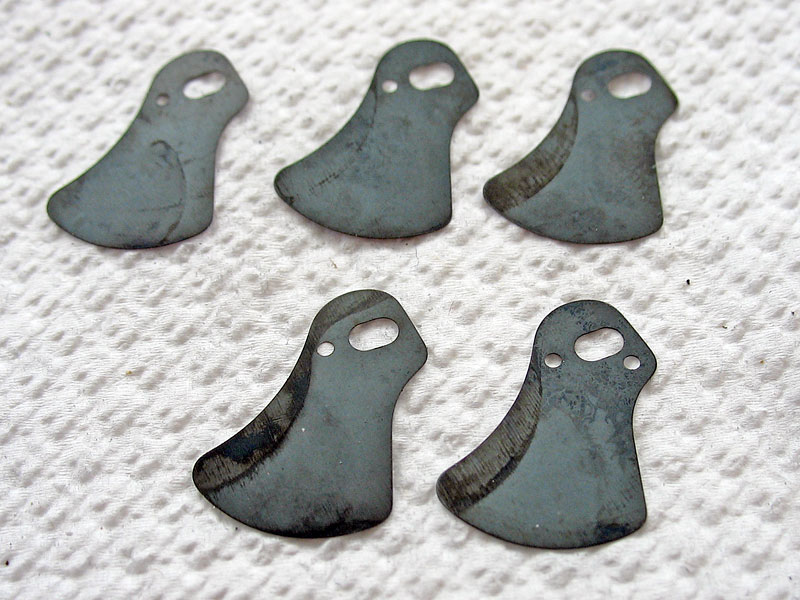
The shutter blades should be cleaned using solvent and cotton buds (Q-tips).If the blades are marked like these ones, then the blades should be polished with metal polish, I use a common product called 'Brasso' for this task.The difference in appearance of the blades after cleaning is quite dramatic, as you can see from pictures of the same blades further down this page.Be very careful not to catch the rag on an edge and bend the blade while polishing it. I use a board with a cloth stretched over it and hold the blade down on that while polishing each side. After using the metal polish the blades should be cleaned carefully with solvent to remove all traces of the polish.

Here you can see return spring for the blade operating lever in its normal position.

The spring should be unhooked and the lever swung out.

The shutter blades are placed one on top of the next, not interleaved like the diaphragm blades.Place the first shutter blade in place. This blade has one extra hole punched into it to help identify it.Note the position of the blade, it should only be fitted in this one position on the mechanism plate.
The other blades are all identical. Place the second blade as indicated in the picture.

Continue installing all the shutter blades working in a clockwise direction. The final blade is placed as indicated.As you can see it lies on top of the first blade as well.
Align the case and the mechanism plate. I usually use the square hole and notch for the flash contact as a simple guide.

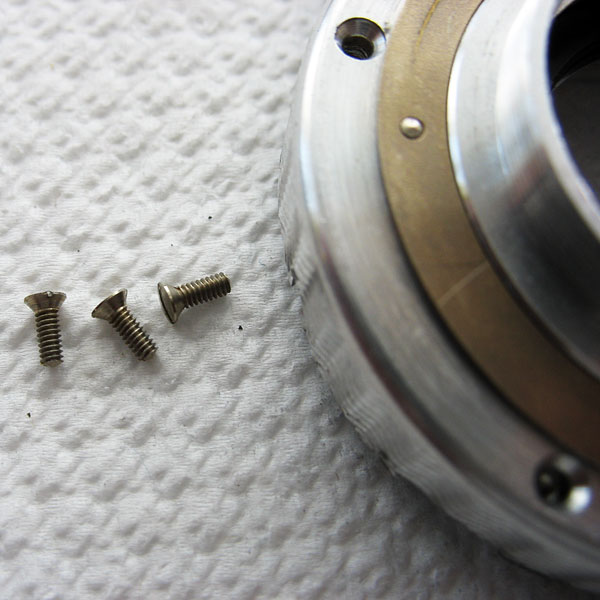
Lower the case carefully over the mechanism plate. Push it down into place and install the three screws, run them in, but do not fully tighten them at this stage.
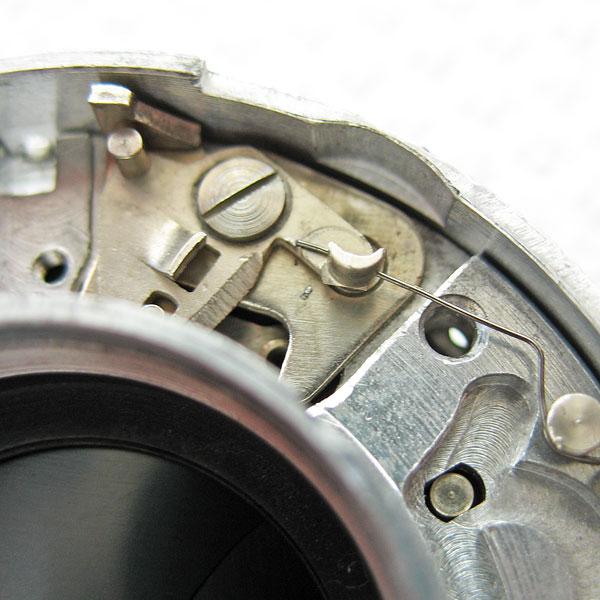
Engage the spring for the blade operating lever, and check that the blades swing smoothly out and back again when the lever is pushed outwards.
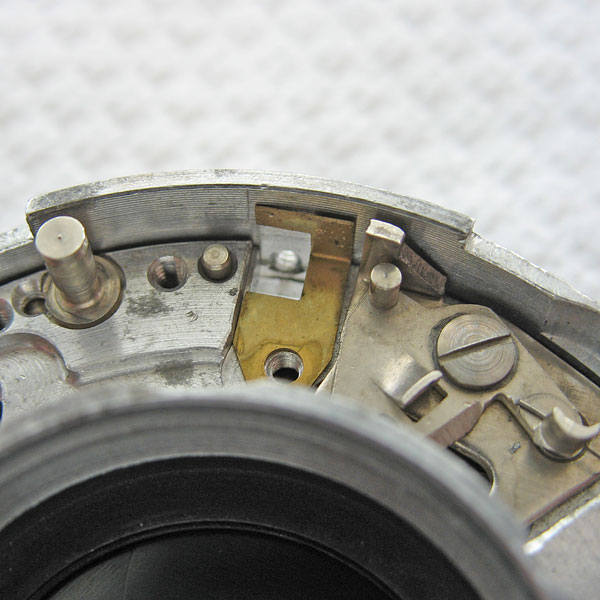
Place the brass plate that fits under the flash contact block.
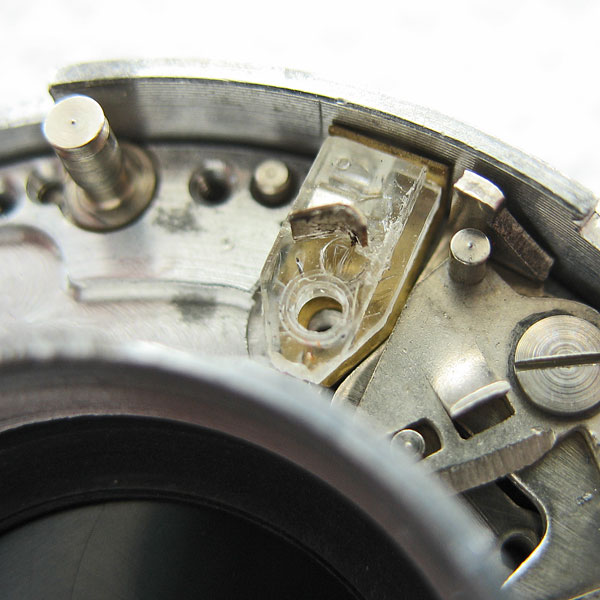
Gently install the plastic flash contact.
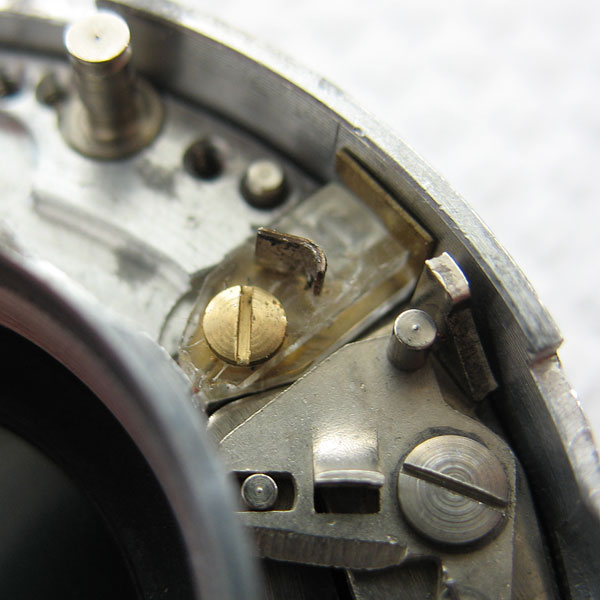
Push it down into place and after checking it is seated properly, install and tighten the brass screw.Turn the shutter back over, and now tighten the three case screws.
Fourth part: assembling the synchro mechanism
Questions? Please contact Chris Sherlock