Chris's camera pages
Kodak Retinette II (type 160) User's guide
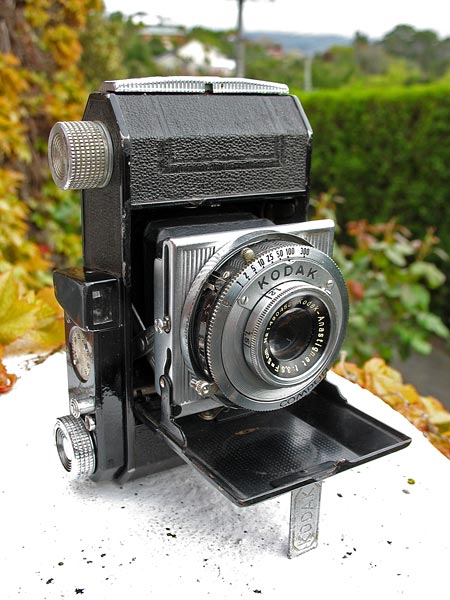
The Kodak Retinette II was the second folding Retinette and was made around 1939, so it is a bit more than 60 years old now. It was built on the same basic chassis as the Retina cameras of the time, and it was available in two "flavours", either with a 5 cm f/4.5 Kodak Anastigmat lens in a 4 speed AGC shutter, or a 5 cm f/3.5 Kodak Anastigmat lens in a Compur shutter. In both cases the lens is of the "front cell focussing" type.
In common with many 35 mm cameras the shutter release on the top plate will only work properly when a film is installed also note that the shutter must be manually cocked for each exposure. The camera has an interlock to prevent accidental double exposures. Before loading the camera check to see if the shutter is working, see below "Setting the shutter"
Film loading
- To load a film in the camera, open the camera back (The release catch is at the centre of the left-hand end of the body and the catch folds down away from the end of the body through around 90°).
- Lift the film rewind knob and place the 35 mm film cartridge into the cavity, push the rewind knob back into place.
- Pull out sufficient film leader to insert the end into the take-up spool and wind the film advance knob in the direction of the arrow until the film sprocket holes are just past the sprocket teeth.
- Close the camera back and turn the film advance knob in the direction of the arrow until it stops.
- Cock and fire the shutter (See below)
- Repeat steps 4. and 5. twice more.
- Turn the film advance knob until it stops once again and now you have unexposed film ready for your first picture.
- Set the frame counter dial by turning it in either direction until the number 1 is aligned with the arrowhead.
nb. The shutter must be manually cocked for each exposure, but it does not especially matter if you cock the shutter before or after winding the film to the next exposure.
Setting the shutter
The Compur shutter fitted to the Retinette II must be manually cocked before each exposure. Looking from the front the shutter cocking lever is at the 2 o'clock position when in the un-cocked state and at the 3 o'clock position when cocked. The shutter may be released directly from the shutter release on the shutter housing ( at 11 o'clock on the shutter) to check shutter function. The shutter speeds are selected by turning the knurled outer rim to align the chosen shutter speed with the small black dot by the letter D in the KODAK nameplate on the front of the shutter. Don't be too alarmed if the slow speeds, 1 to 1/10 seconds, don't appear to work. The lack of proper function here will probably not affect the faster speeds to any great extent. For practical outdoor use with modern films you will be more concerned with the 1/50, 1/100 and 1/300 second speeds. Check that these speeds appear to work, the shutter should "snap" open and closed.
The AGC four speed shutter has a slightly different lay-out but works in very much the same manner. The cocking lever for the AGC shutter is a small chrome tab at the 5 o'clock position on the side of the shutter (Kodak nameplate at 12 o'clock).
Setting the Aperture
Aperture settings on the Compur shutter are shown by the small chrome pointer against the white aperture numbers on the black scale at the top of the shutter housing. The values are set by the round button ended lever at the bottom of the shutter housing.
The values are from f/3.5 to f/16 on the Compur shutter, and from f/4.5 to f/16 on the AGC shutters.
Getting the Exposure Right
Use an exposure meter to determine correct exposure or by using either exposure tables or by estimate.
A good rule for exposures to remember is what is known as the "sunny 16" rule. Basically for any given film for correct exposure of an average subject in full sunlight set the shutter speed to 1 divided by the film speed and set the aperture to f/16.
e.g.. With ISO 100 film use 1/100 sec ( or 1/125 sec.) at f/16.
With some light cloud you can use f/11, light overcast f/8 and in heavy overcast f/5.6
Remember the 1/300 speed probably runs slightly slow so use this setting as if it were 1/250 second when calculating the exposure.
Setting the Focus
There is no built-in rangefinder on the Retinette so you will need to set the focus distance by estimate, which is not too hard, or either by using an accessory rangefinder or a tape measure. The focus is set by turning the front lens group in the shutter body and the engraved distances set against the chrome pointer on the shutter body which is at about 1 o'clock on the front of the lens/shutter assembly (Kodak nameplate at 12 o'clock). The lens is turned clockwise to the infinity position (looks like a figure 8 on its side) and anticlockwise towards the closest focus position (1 metre on this one).
On the example I have the scale appears to be marked in meters but others may possibly be marked in feet instead.
Rewinding and unloading the Film
When you reach the end of the film, which should be obvious from the way the advance knob resists any further movement, you will need to rewind the film into the film cartridge.
To do this push the rewind lever, which is the small knurled one visible on the back of the camera top just behind the film advance knob, to the left towards the "R" setting. Rewind the film by turning the rewind knob clockwise in the direction of the engraved arrow. The film advance knob will revolve clockwise too so it will be obvious that the film has finished rewinding when either the advance knob stops turning or if the film leader is well stuck in the take-up spool then the rewind knob will just not turn any further.
Next time you turn the film advance knob in the normal direction to load a new film or whatever this will automatically return the film rewind lever to the "A" position.
Good luck!