Chris's camera pages
Retina ground glass focusing adapter
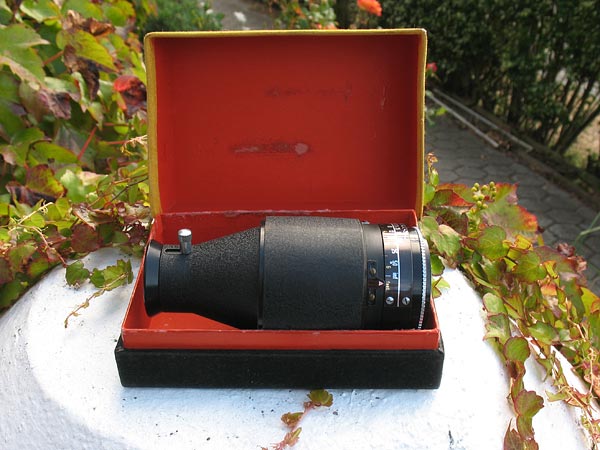
Here is a copy of the original instructions for this very unusual accessory.
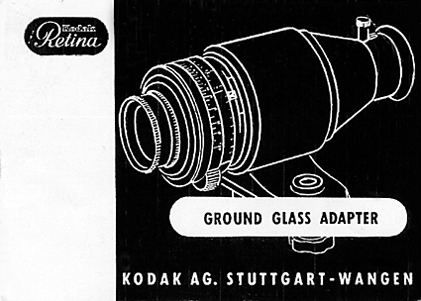
The KODAK Ground Glass Focusing
Adapter for the RETINA IIc and IIIc is a very useful accessory for all subjects where
the precise field of view and visual estimation of perspective, illumination,
and depth of field are important. Two versions are available, for RETINA Xenon
C and for RETINA Heligon C lens systems. The bayonet mount of the ground glass
adaptor accordingly carries an engraved X (for Xenon) or H (for Heligon).
The ground glass focusing adapter will take
the standard lens by itself or with supplementary N- and R-lenses (in any
combination),as well as the telephoto and wide-angle lenses. The ground glass
screen always shows the exact effect.
Focusing the Eyepiece
Before working with the ground glass adapter it must be
accurately set for the standard, wide-angle, and telephoto lenses of the RETINA.
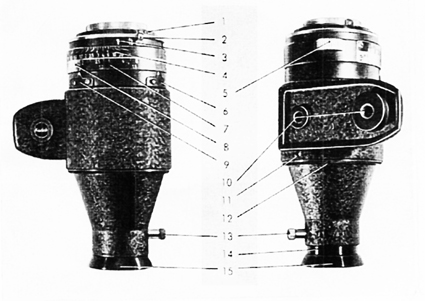
First of all, however, the eyepiece (15) requires adjusting to the eye of the
user. For that purpose fully open the lens diaphragm, and point the ground glass
adapter at a bright surface (a light wall, or the sky). Slack off the eyepiece
clamping screw (13), and adjust the tube (14) until the grain of the ground
glass screen appears sharp. Then tighten the clamping screw again.
Focusing the Standard lens on
"Infinity"
The ground glass adapter incorporates a permanently built-in lens component
which forms a complete lens system only with the interchangeable component
of the standard lens on the camera. Accurate initial setting is therefore
essential. Remove the interchangeable component of the standard lens from
the camera and mount it on the ground glass adapter by placing it in position
with the red dots in line and turning clockwise as for as it will go.
Set the focusing scale for the standard lens
to infinity, and slack off the small screw (11) with a fine screw driver. Turn
the ground glass screen by means of the milled screw ring (12) to obtain maximum
sharpness at infinity. To do that sight a distant object (e.g. a factory
chimney, telegraph pole, etc.) which should if possible be at least 300 feet
away. When this distant object appears really sharp, tighten the small screw
again, thus locking the screw ring in position. The ground glass focusing
adapter is now set for sharp focus with the standard lens. This adjustment must
be very exact, as the perfect working of the ground glass adapter depends on
it.
Focusing the Tele and Wide-angle
Lenses
After fitting the tele or wide-angle lens unit, again sight a distant object
more than 300 feet away, and focus it sharply by moving the focusing lever
(5). If the focusing index does not point to infinity on the corresponding
focusing scale, slack off the two small screws holding the pointer for the
tele or wide-angle focusing scale respectively, and adjust the position until
the telephoto index pointer (6) points to infinity on the telephoto focusing
scale (7), and the wide-angle index pointer (9) to infinity on the wide-angle
focusing scale (8). These adjustments also need great care.
Setting Up the Ground Glass Adapter
Screw the ground glass adapter to the camera platform, and
mount the latter on a table stand or tripod, according to the requirements of
the subject. Then fit the lens to be used.
Working with the Ground Glass
Adapter
To use the ground glass adapter, first settle the field of view, viewpoint,
and lighting of the subject on the screen. Once that is done
and the position of the ground glass adapter (i.e. the camera position to
be used) is fixed, determine the distance and depth of field.
To do this observe the subject through the eyepiece, or with the eyepiece
removed, directly on the screen while moving the focusing lever (5) and adjusting
the aperture lever (2).
After determining the distance and aperture (for the required depth of field)
with the ground glass adapter, read off and note down the
settings. Then, and only then, remove the ground
glass adapter from the camera platform without shifting the latter. Take the
lens out of the adapter and mount it or the camera. Set the camera to the same
distance and aperture. BUT be sure to transfer the distance setting to the
correct focusing scale; the corresponding scales on camera and adapter are in
the same colours. After setting the distance select the shutter speed to be
used, and only then (because of the aperture-speed coupling) adjust the aperture
on the camera.
Taking the Picture
When all settings are correct, mount the camera on the
camera platform in the same way as the ground glass adapter was mounted before.
Now make the exposure, preferably with a cable release. The film will record the
subject exactly as it appeared on the ground glass screen.