Chris's camera pages
Replacing Retina shutter cocking racks.
First a word or two about the original cause of the problem. When the cocking rack strips it can be just normal wear and tear has taken it's toll, those old racks were made out of soft metal, but it is often because the rack has only been working on the tips of the teeth when under load. This can be caused by a couple of things. It is common to find in a Retina needing a new rack, that the screw that forms a guide to the rack near the advance lever shaft is slightly loose. Another common cause is that the bush on the film advance shaft is worn, or the shaft itself, or a combination of both.
Advice often heard is that you should never let the film advance lever fly back to the rest position at the completion of a film winding stroke, but should guide it back gently with your thumb. I'm not convinced this is a great factor, but it can't do any harm.
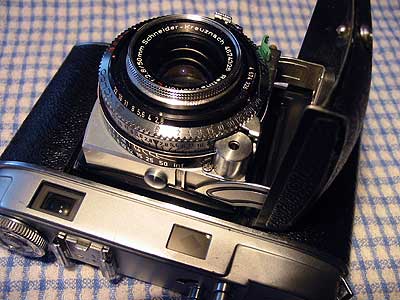
When it's time to replace the cocking rack on your Retina IIc or IIC the instructions below will show you what you'll need to do........
For those of you dealing with a Ib or IIIc, they are very much the same once you are "under the hood". Points to watch are, with the more-common IIIc with the twin-range exposure meter, the one with the metal flap, leave the meter dial alone, it comes off with the top cover. With the Retina later IIIc with the single-range meter and the Retina IIIC, you need to undo the pin-head screw holding the meter dial in place, and lift off the dial before removing the top cover. Retina Ib, the top comes off just like a Retina IIc, and for the Retina IB, remove the meter dial just as for the IIIC. The meters may or may not, be held in place with one or two screws. I'm sure you'll figure it out.
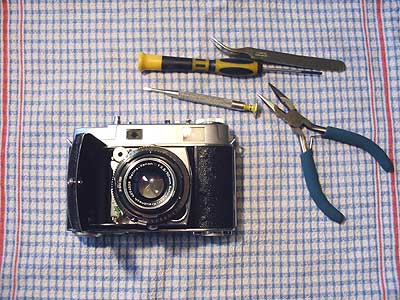
Start with a clear working area. A dish towel from the kitchen drawer works great as a work surface.
First unscrew the rewind knob while holding the shaft from turning with a screwdriver or similar tool.
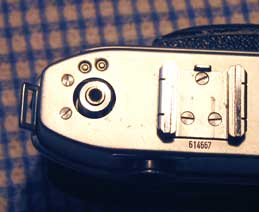
Remove the two screws at the far left of the top plate.
Remove the single screw at the right end of the top plate.
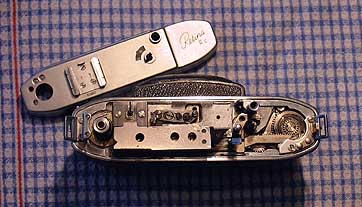
Lift off the top plate to uncover the cocking rack.
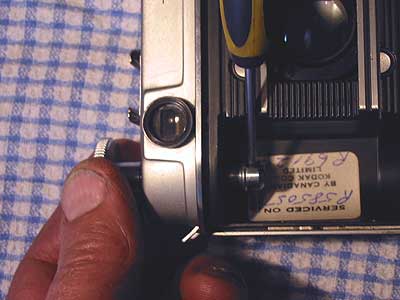
Remove shutter release button and the film release button but do not remove the shutter release shaft visible here at the front of the camera.
I've had a string of 'help me, I messed-up' emails from people who ignored the advice above to leave the the shutter release shaft in place, and who have since discovered that once it has been removed, bad things can happen....Using a rubber-band like this is handy way of keeping it in place while you work on the camera.
Remove the two screws holding the right-hand strap lug and lift the strap lug away.
Unscrew the two screws at the front and rear of the rack hold-down plate. Next unscrew the film release button shaft. This has flats visible at the base of the shaft. The original Kodak repair tool was a special driver consisting of a hollow shaft with a shallow slot machined across the end to drop over the flats of the shaft. You can get away with using a pair of needle-nose pliers providing the tips will grip the flats without the jaws damaging the shaft itself. Lift away the hold-down plate to expose the rack completely.
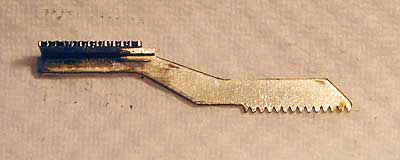
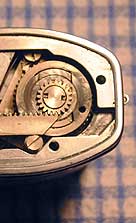
This is what a worn, but serviceable cocking rack looks like. The slight deformation of the teeth is visible if you look closely enough.
Not like the one below.......
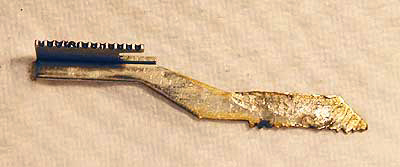
This is what the cocking rack looked like in a dead Retina IIc I bought a couple of years back.
Someone apparently had tried to repair the rack, but weren't very successful.
Clean any dirt and old dried out lubricant from the around the path of the cocking rack. Apply a little clean grease to the teeth at both ends of the new rack and fit into position.
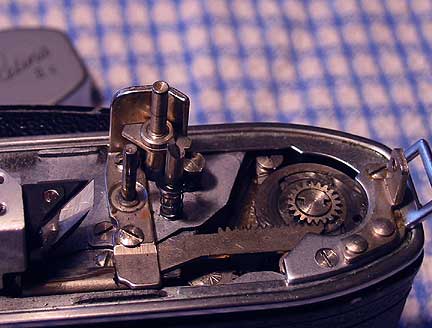
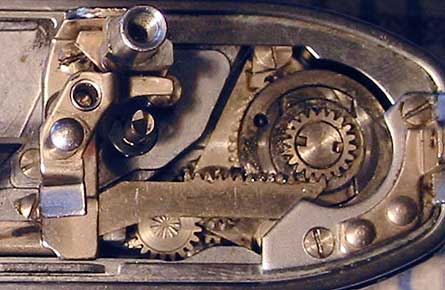
Note the way the teeth of the rack and the gear are aligned with the film advance lever in the rest position in this picture.
Refit the hold-down plate. Start with one screw, but don't tighten it up yet. Fit the film release lever shaft and the final screw then go back and finally tighten them.

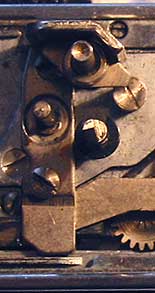
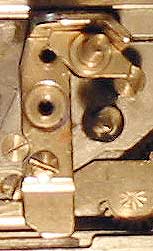
Before you replace the strap lug check that the screw that forms the support for the cocking rack (visible here just below and to the left of the film advance shaft ) is good and tight.
If this screw is loose it will allow the cocking rack to push away from the gear which then means that the load is taken just at the very tips of the teeth instead of across the full width of the teeth causing premature failure.
Fit the strap lug, tighten the screws. Replace the shutter button and the film release button.
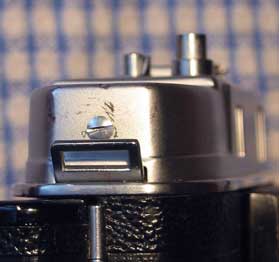
Clean the prism at the end of the rangefinder, I usually manage to get finger smudges on it while struggling to get that film release button shaft screwed back into place.
Now you can put the chrome top back onto the camera body. You will probably have to wriggle things around to get that film release button to pop up through the hole.
Replace the screws that hold the top and refit the rewind knob.
Carefully try the advance lever. If the coupling to the shutter does not need adjusting, which is possible, but unlikely, then the film advance lever will advance smoothly to the end of the stroke and will return by itself. The shutter will be cocked by the action and will release when you depress the shutter release.
If the film advance lever moves forward but doesn't return this is a sign that the shutter cocking is one or more teeth too far advanced. NEVER try to force the film advance lever or you will strip the rack you probably just finished paying $25 for, and perhaps break the gear into the bargain.
Most likely you will find that the film advance lever moves normally, but the shutter cocking action is not moving quite far enough to cock the shutter. When you depress the shutter release you just get a "click" sound, but this is just the film advance interlock releasing.
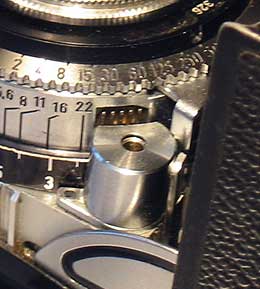
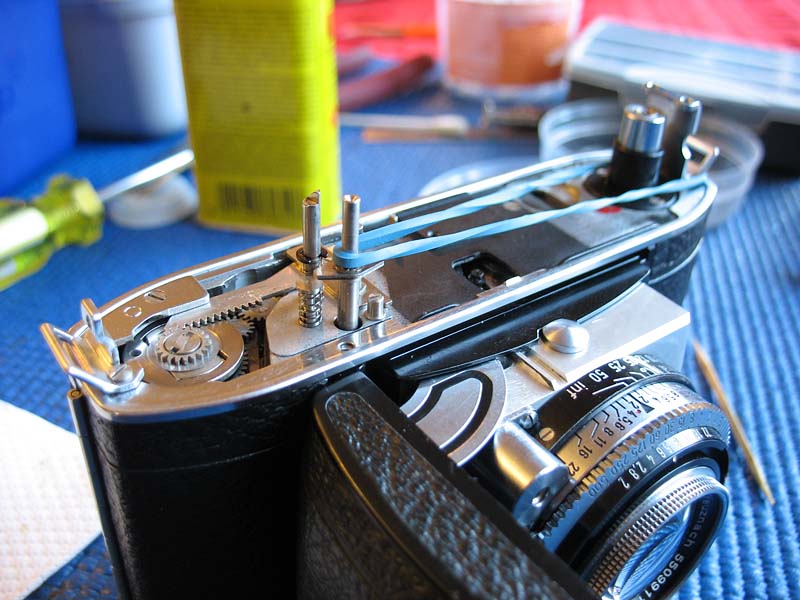
In either case if the shutter cocking action is not working correctly you will need to loosen the screws holding the coupling gear cover at the top right of the shutter to adjust the timing of the gears.
You will find it easier to loosen the screws and adjust the setting if you set the focus to the closest focus position. Remove the upper screw and just loosen the lower one, which is quite difficult to reach under the shutter release coupling on the shutter.
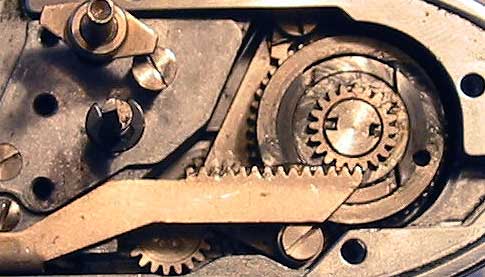
If the shutter was failing to cock you will need to advance the shutter cocking action by one tooth at a time by holding the gear back from the curved toothed rack visible in the opening and move this rack one tooth to the left.
You should hold the gear cover firmly in place with one finger to hold the gears in mesh while you retry the film advance and shutter cocking action. If it now works correctly refit the upper screw into the gear cover and tighten both it and the lower screw.
On the other hand, if the film advance lever was not able to move far enough forward to complete the film advance action and return to the rest position, then the shutter cocking action is one or more teeth too far advanced. Use much the same procedure as above except this time you will need to move the curved rack visible in the opening one tooth to the right instead.
Make any change one tooth at a time and exercise caution.

All done and ready for action!