Chris's camera pages
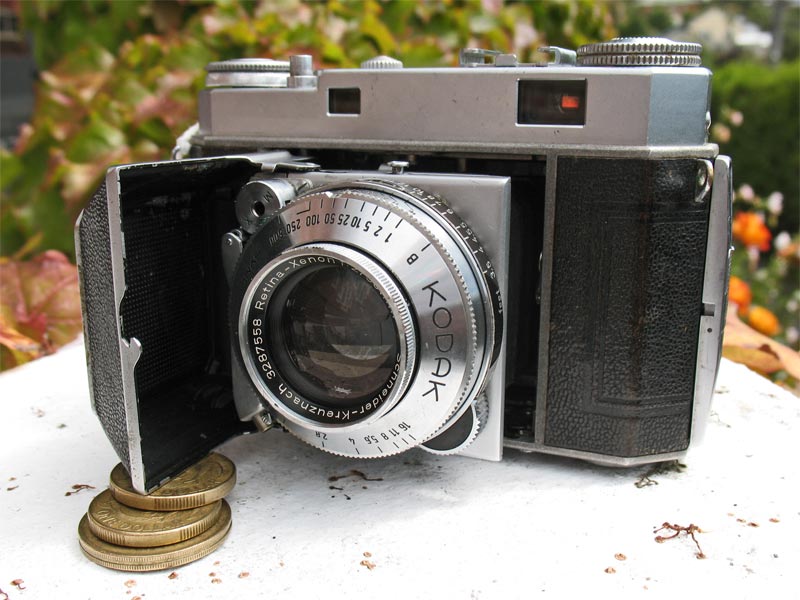
How to clean the rangefinder on a Kodak Retina IIa camera
(If you came here looking for advice on cleaning the rangefinder on a Retina IIc or IIIc, just leave now, they are completely different and there are very good reasons that I haven't made instructions for dealing with them.)
There are no access holes for adjustments or cleaning hidden under the accessory shoe, so you can leave that alone. The whole top cover will need to be removed to get to the rangefinder, and here are the instructions for that particular task.
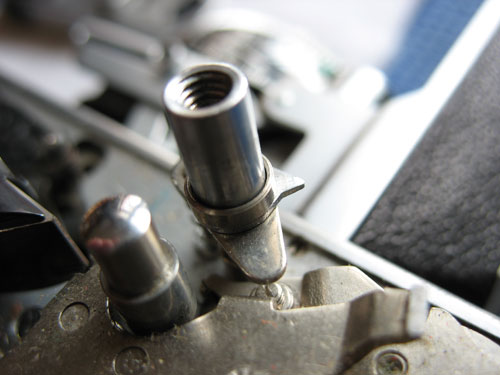
Lift off the loose parts that will otherwise get lost.Start by removing the button off the top of the shutter release and be careful not to lose the thin collar on the release button if there is one present.Leave the shutter release shaft in place in the camera.
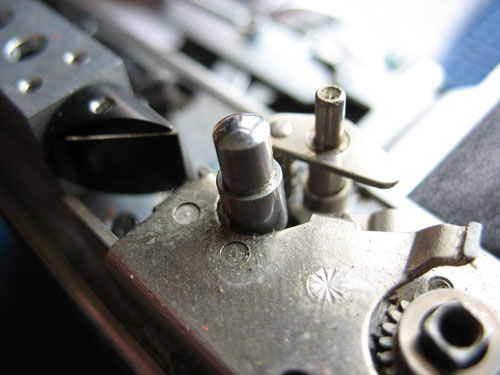
Lift off the film-release button and the fine coil-spring underneath it.Do not lift or disturb the gear on the top of the advance shaft or you will lose the correct timing of the shutter-cocking mechanism.
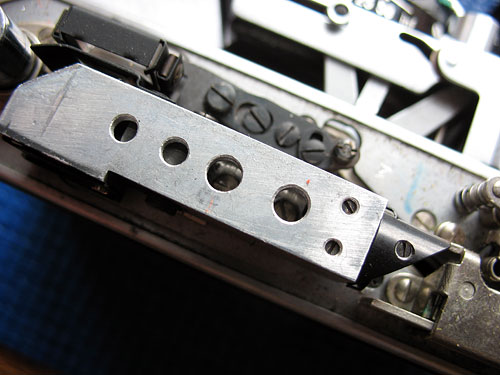
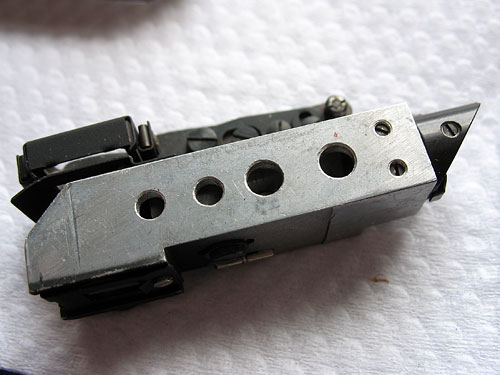
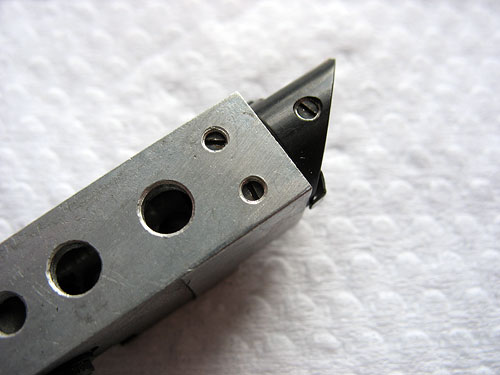
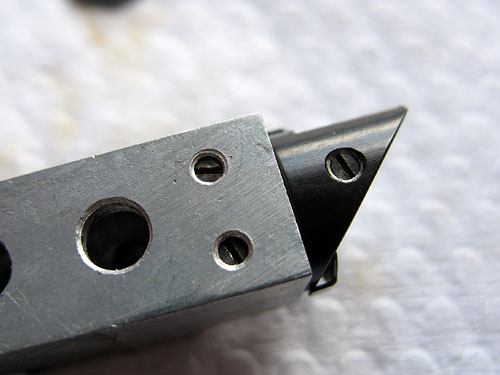
Remove the two screws holding the rangefinder to the top of the camera body casting. The heads of the two screws are just visible here at the bottom of the two large holes in the rangefinder body.
Lift the rangefinder assembly off the camera, and place the camera aside somewhere safe where it won't get knocked over.
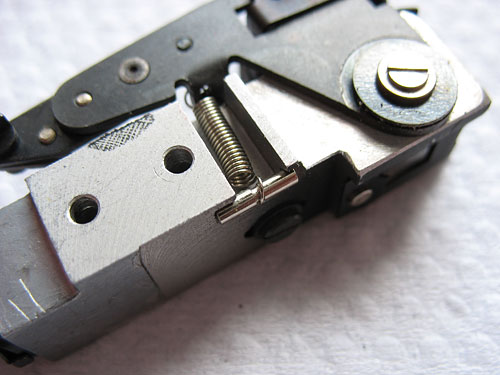
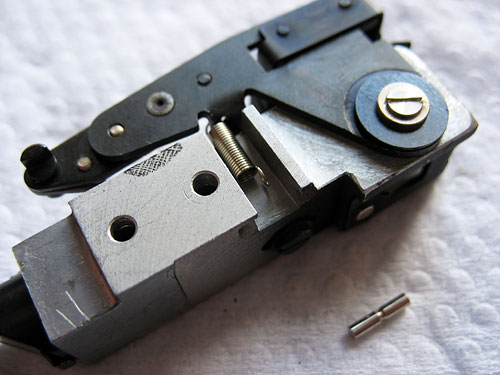
Turn over the rangefinder assembly and remove the chrome pin holding the return spring in place.
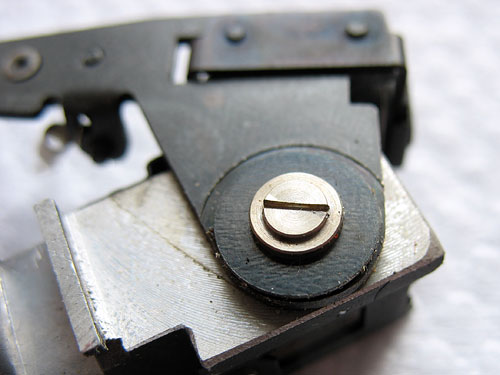
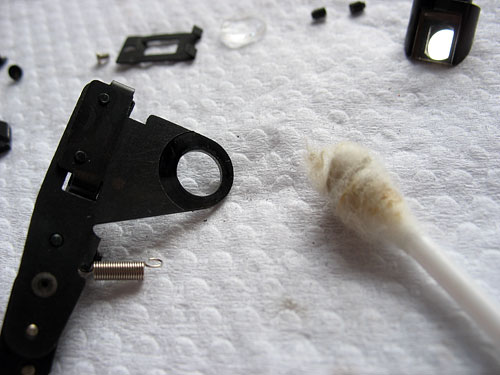
Remove the single large screw holding the rangefinder arm to the body of the rangefinder, lift the screw, washers and the arm off the rangefinder body.

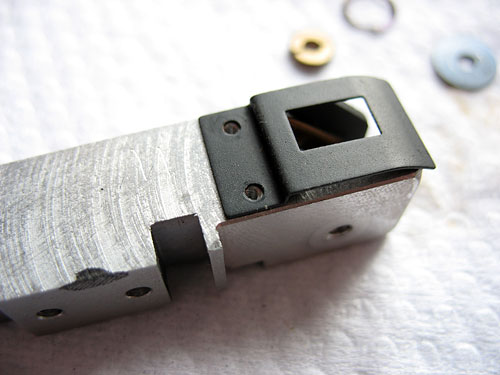
Remove the two black-painted screws holding the front frame in place, and lift off the frame.
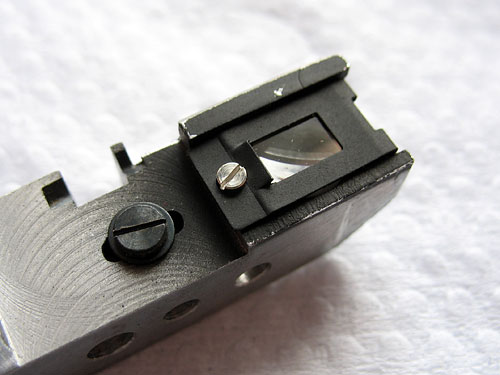
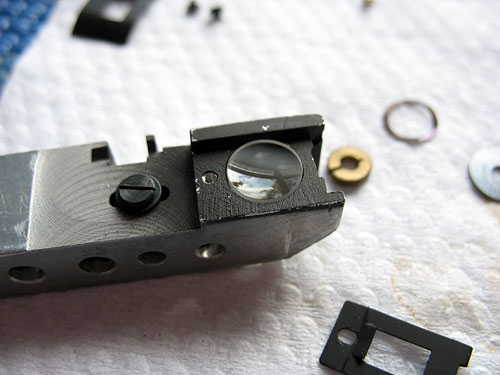
Remove the single nickel-plated screw holding the rear frame in place.Lift off the frame and tip out the rear lens.Leave the black screw on the back of the rangefinder assembly alone.
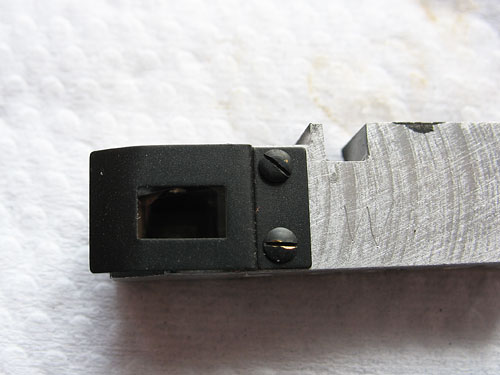
Remove the two small screws in the rangefinder body holding the prism assembly in place. Do not disturb the single screws at top and bottom of the prism assembly, These hold the prism glass into the prism assembly.Lift the prism assembly out of the rangefinder body.
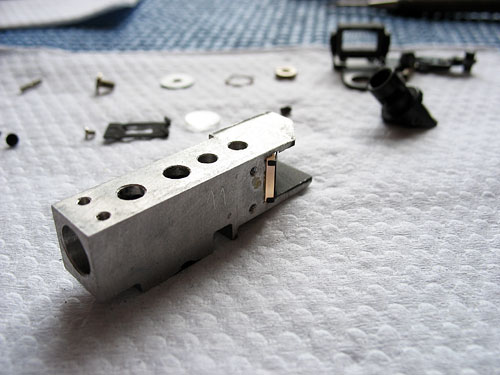
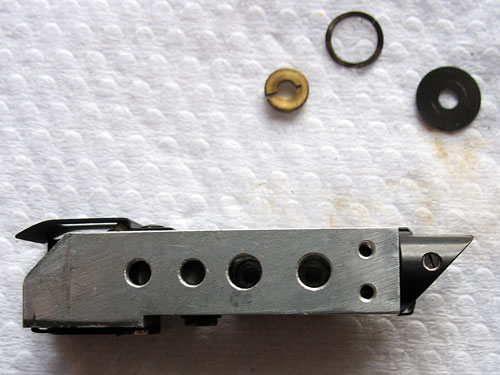
Lay out the various parts ready for cleaning and reassembly.

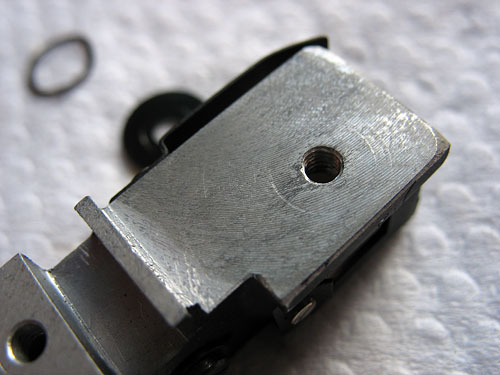
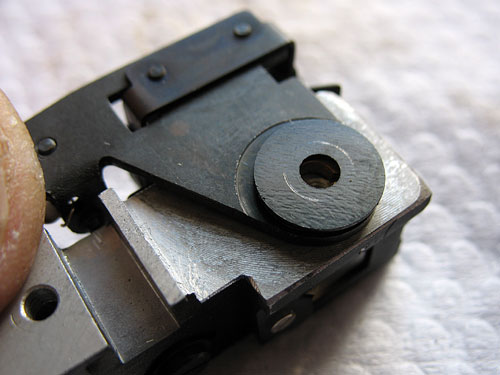
Using a cotton bud (Q-tip) soaked in lighter fluid or similar solvent, clean away any grease and dirt from the surface of the rangefinder body where it contacts the arm.
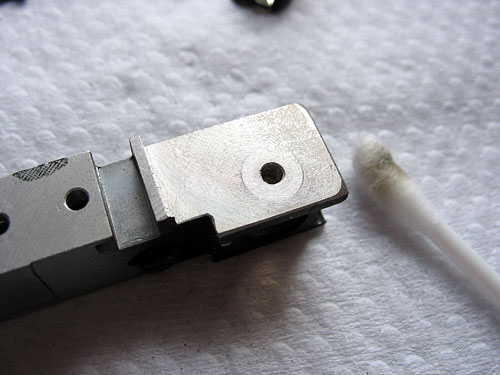
All traces of old grease have been cleaned away here.
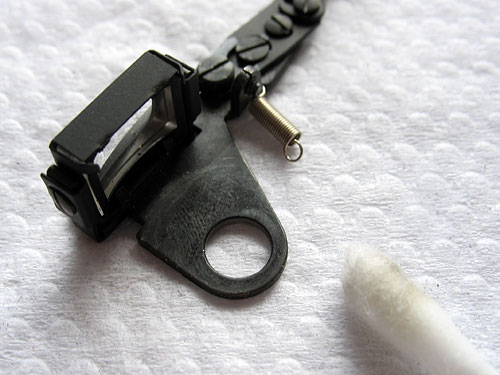
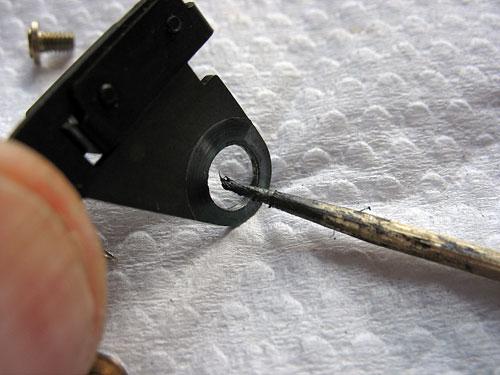
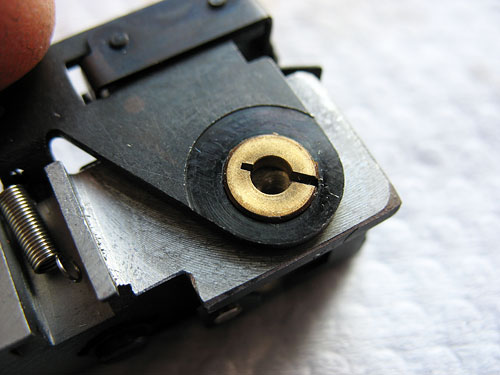
Push the brass bush out of the rangefinder arm and using a cotton bud and solvent as above, clean the arm paying particular attention to the areas that contact the rangefinder body.
Be sure to clean top and bottom surfaces, and the inside edge of the hole.
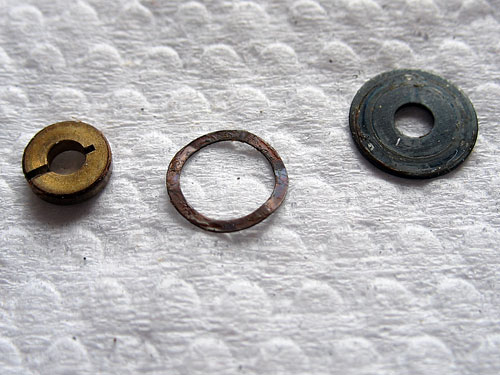
Clean away any dirt or old lubricants from the brass bush, the flat washer and the spring washer.
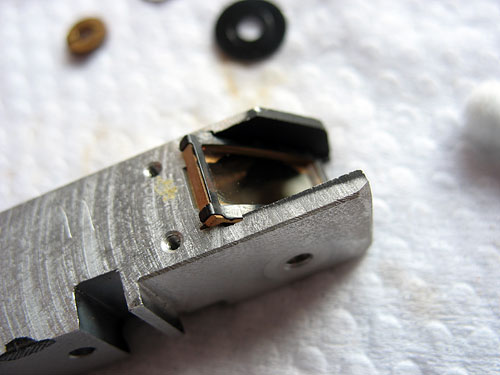
The angled 'mirror' in the rangefinder of the Retina IIa is formed by brown-tinted glass, has no silvered surface to damage, and is fairly robust. I usually clean it in place in the rangefinder body with an ultrasonic cleaner, but it can be cleaned successfully in place with cotton buds (Q-tips) moistened with water, or if there is an obvious oily film, a suitable glass cleaner instead.
There are two prism surfaces to clean, the obvious one on the outside, and the one that faces inwards, accessible through the tubular end.Both of these surfaces can be cleaned with cotton buds as above.Blow out any dust or fibres from the cotton buds.
The rear lens should be cleaned and dropped into place.The lens could be described as concavo-convex, but all you need to know is that the more curved surface goes inwards, and the flatter surface to the outside.

Put the rear frame back in place, fixing it with the single nickel-plated screw.
Place the front frame back on the rangefinder body.
Insert and tighten the two screws making sure the frame is square to the body, and clear of the lower edge so as to not contact the rangefinder arm.
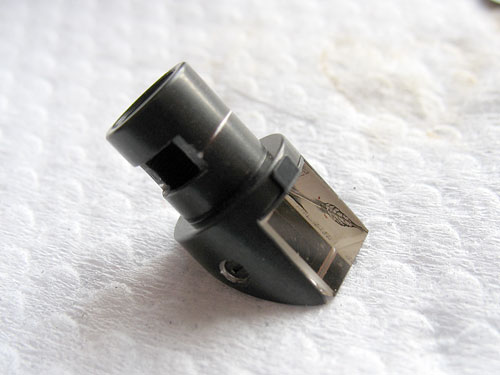
Place the cleaned prism back into the body.
Fix the prism in place with the two screws.The front face of the prism should be in the same plane as the front of the rangefinder body, and the prism should be snug against the end of the body.
Apply some lubricant to the body of the rangefinder where the arm will contact it. I have used a dry molybdenum lubricant evenly and very thinly spread.
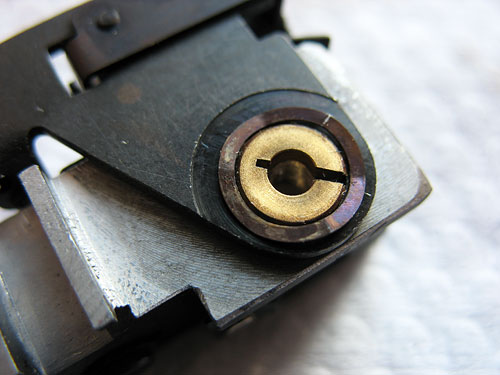
Carefully clean the both sides of the lens on the rangefinder arm, and then lubricate the inside edges of the hole in the rangefinder arm.I have used the same molybdenum lubricant for this job.
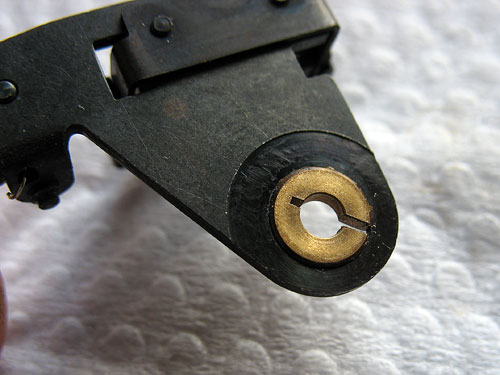
Push the brass bush into the arm. It should be flush with the upper surface of the arm.
Place the arm into position over the screwhole.
Apply a thin film of molybdenum to high spots either side of the spring washer and place it over the bush.
Put the plain washer in place.
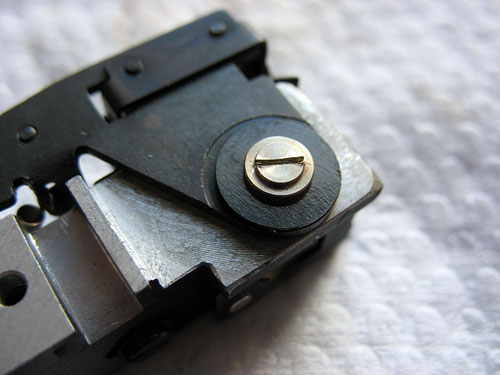
Fit the screw, tighten, and check that the arm swings smoothly and freely.
Ensure that the return spring lies in the channel.
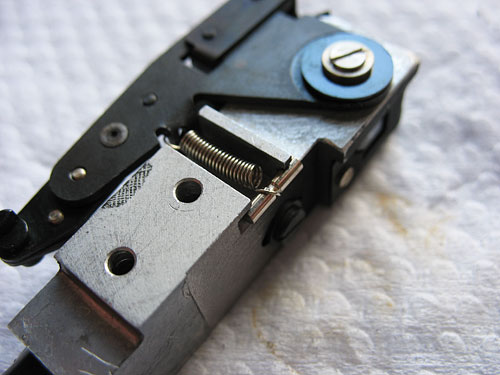
Push the pin through the end of the spring, and giving the spring a half-turn to make it clear the surface of the channel, drop the pin into position in the notches on the rangefinder body.
The rangefinder assembly is now ready to be refitted to the camera body and adjusted.